HEA Custom Post Tabs
Refer to the documentation below to get a detailed guide on how to use the Post Tabs widget effectively.
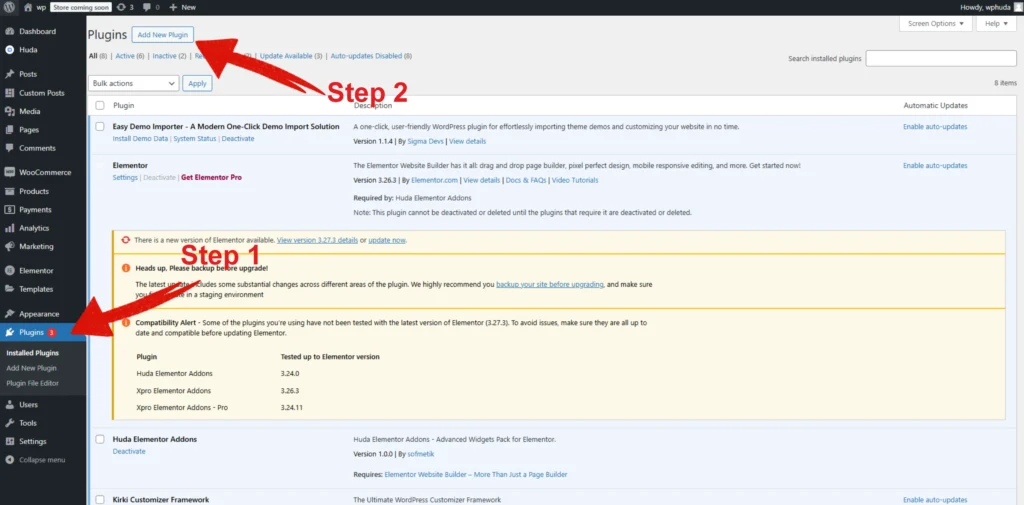
Step-1:
Log in to your WordPress Dashboard, then navigate to Plugins. Click on the “Add New Plugin” button at the top of the page.
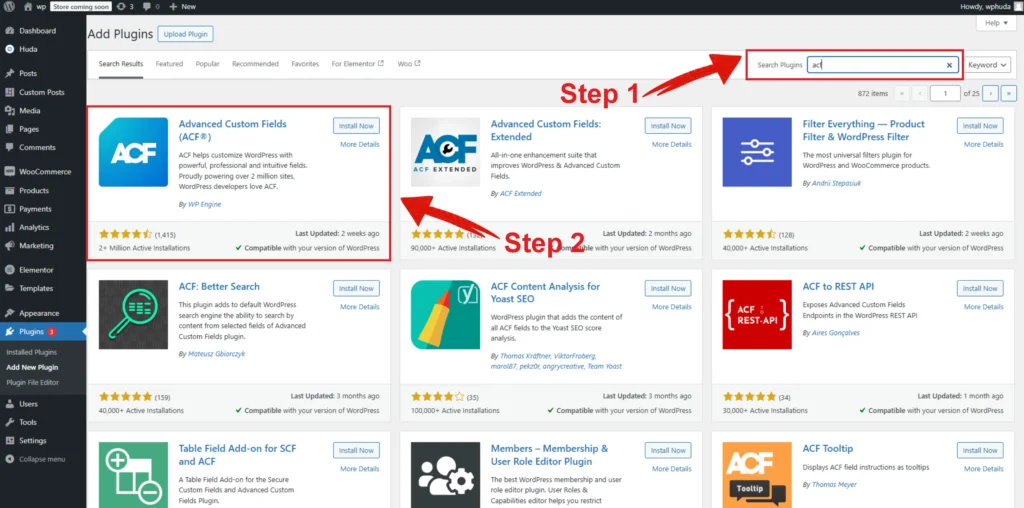
Step-2:
In the “Search” option, search for “ACF”. Install the “Advanced Custom Fields (ACF)” from the list. After installation Activate the plugin.
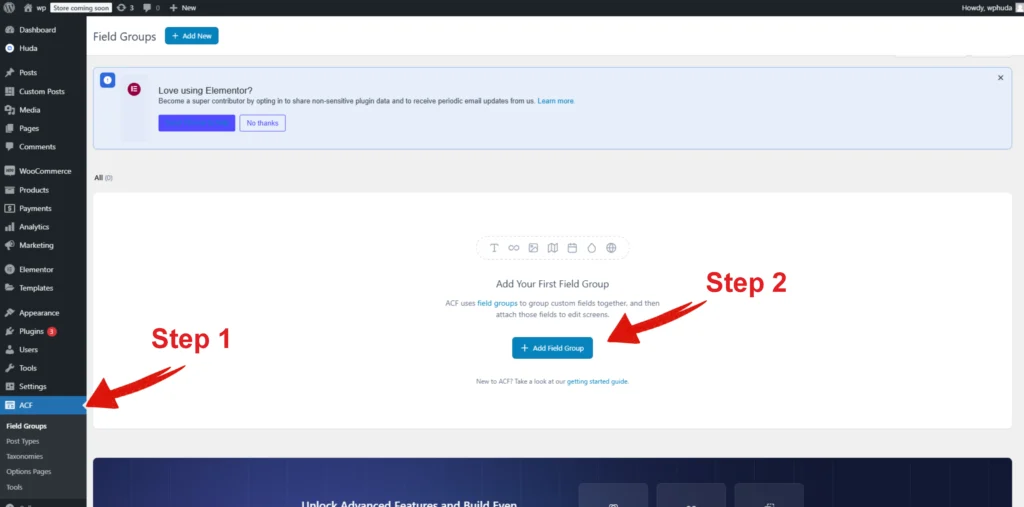
Step-3:
In your WordPress Dashboard, navigate to ACF. Click on the “Add Field Group” button.
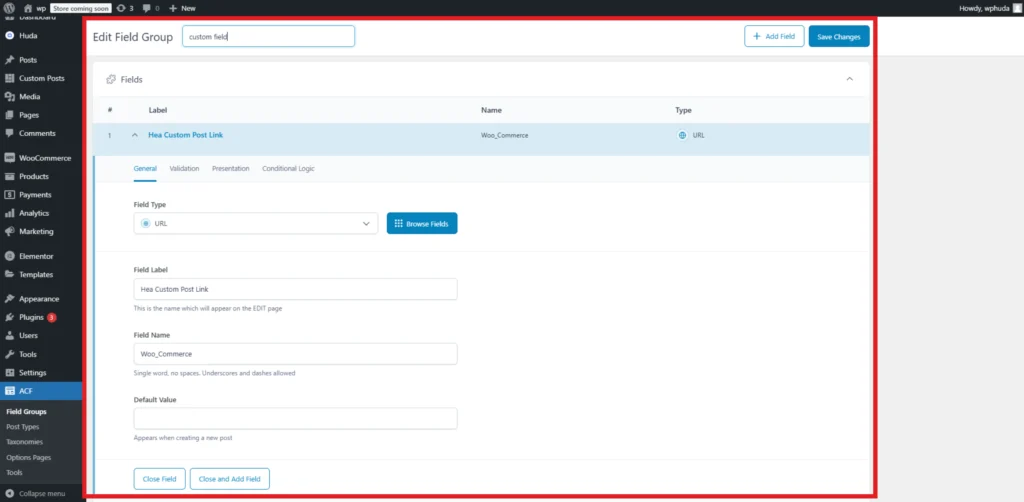
Step-4:
In the Add New Field Group, write your name first. Then select URL in Field Type option. In the “Field Label” option, write “Hea Custom Post Link”. Then write your field name and hit the button of save on the top right corner.
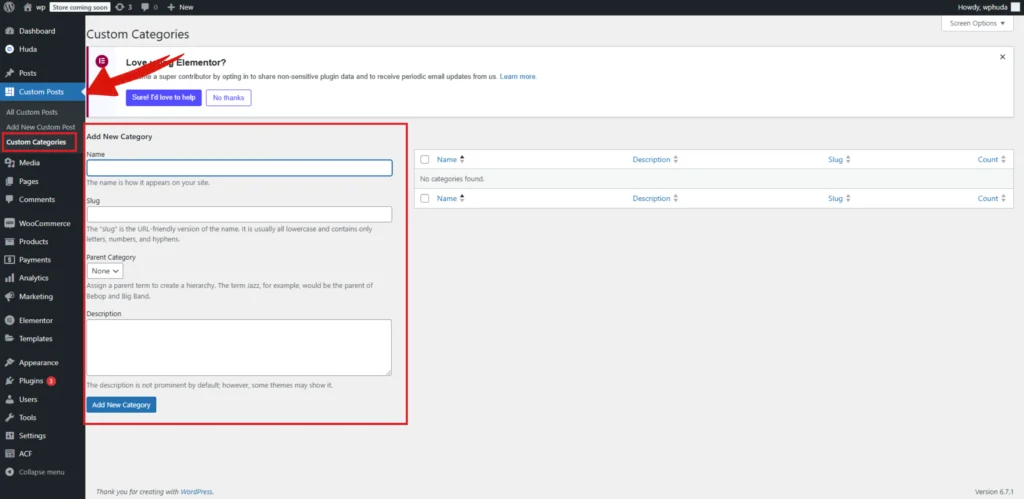
Step-5:
In the WordPress Dashboard, navigate to Custom Posts> Custom Categories. Write your category name and hit the “Add New Category” button at the bottom of the page.
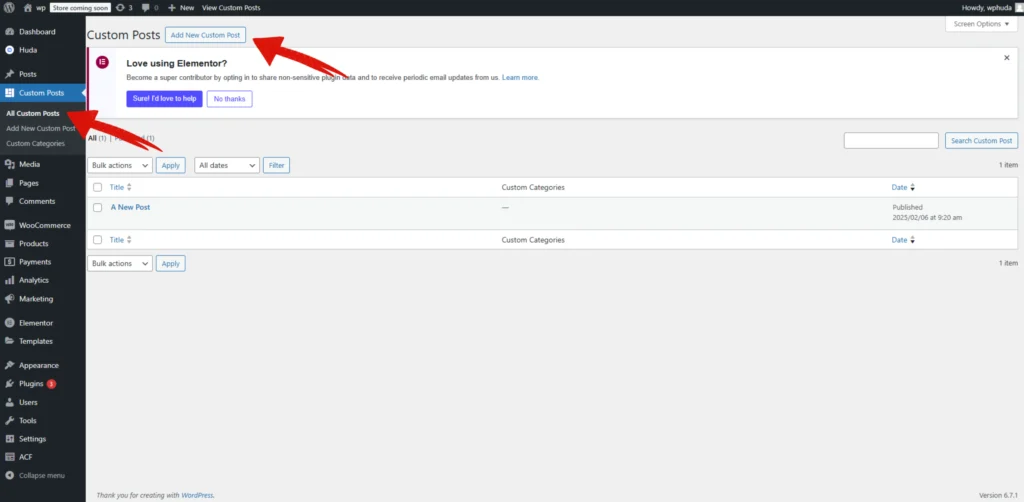
Step-6:
In the WordPress Dashboard, navigate to Custom Posts> Custom Posts. Click on the “Add New Post” button at the top of the page and add your posts here.
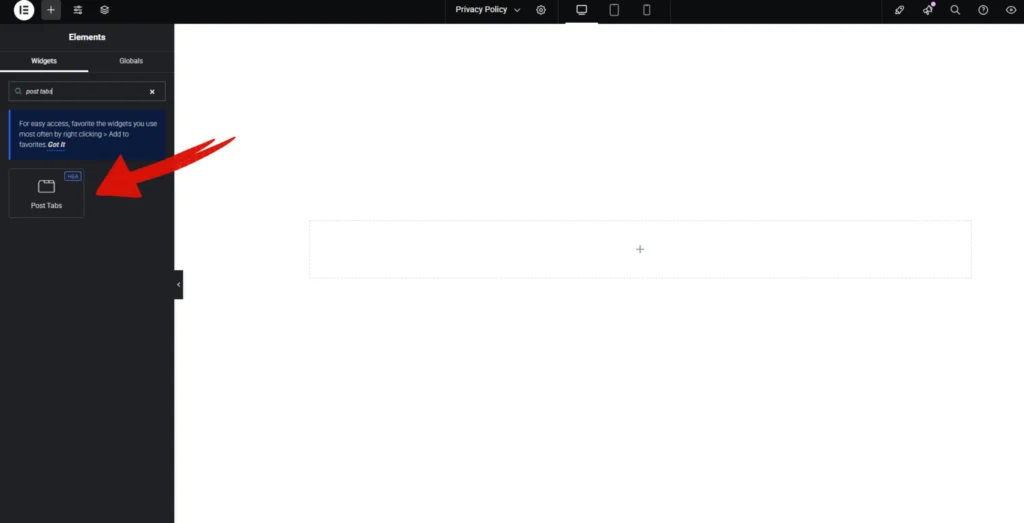
Step-7:
Open Elementor Editor Search for “Post Tabs” in the Elementor panel, drag the “Post Tabs” widget to a container on your page.
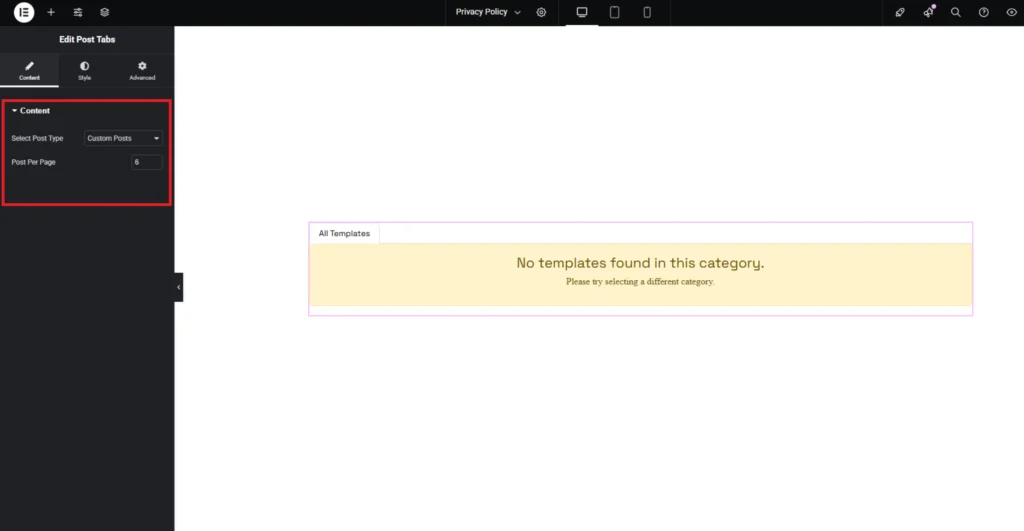
Step-8:
In the “General” section, start by selecting a Post Type. Adjust the posts per page.
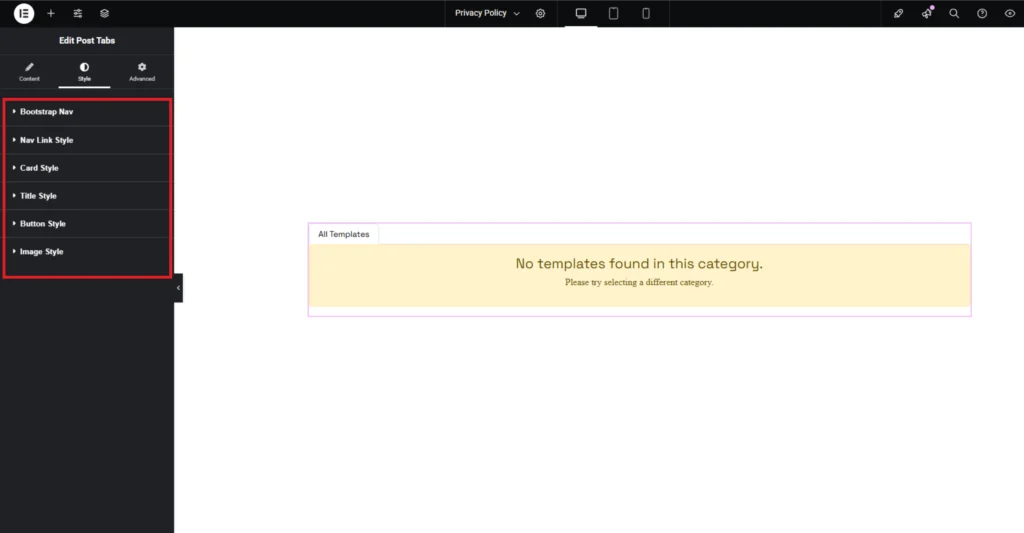
Step-9:
In the “Style” section, customize the appearance of the Bootstrap Nav, Nav Link, Card, Title, Button, Image, and Hover effects to match your design preferences.