Menus
Step-1:
Log in to your WordPress Dashboard, and install the required plugin kirki Customizer Framework. After plugin installation, go to your WordPress Site.

Step-2:
Click on the “Customize” button at the top of the page.

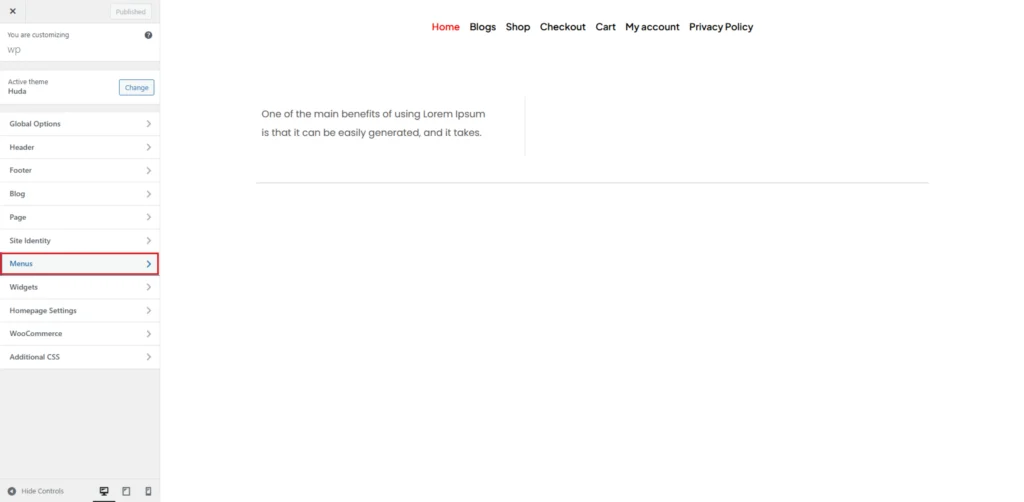
Step-3:
Navigate to Menus.
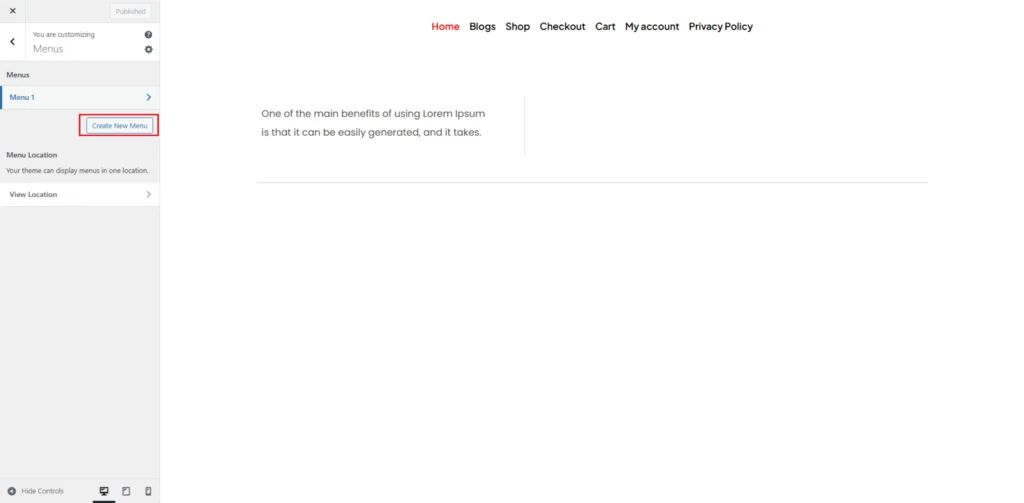
Step-4:
The Menus panel allows you to add, remove and customize your menu. Click on the Create New Menu button.
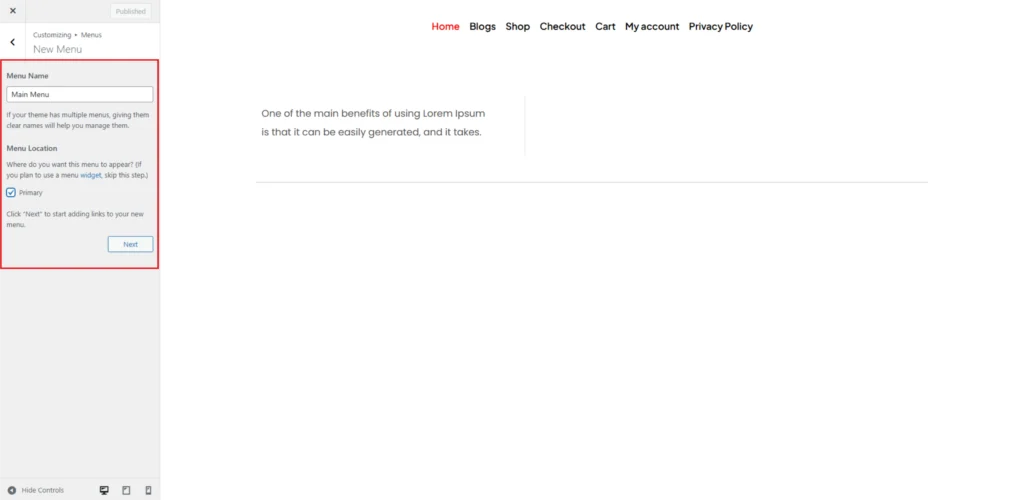
Step-5:
Then in the Menu Name section write your menu name and check if its primary. Then click on the next button.
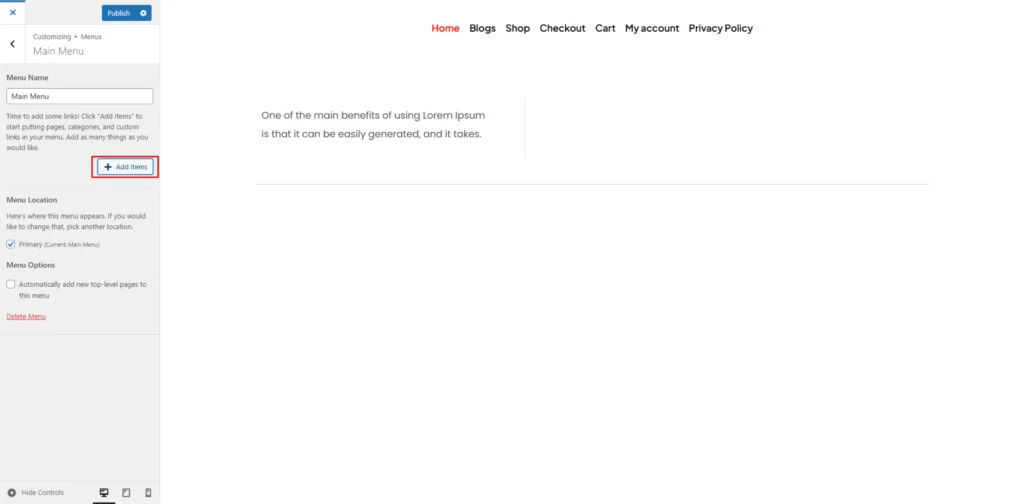
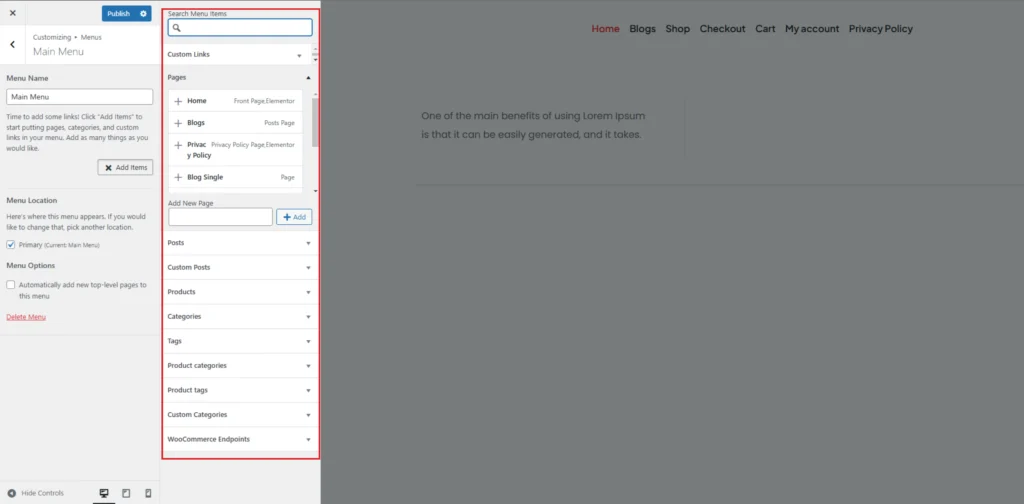
Step-6:
Click on the Add Items button to add items in your menu. Then add your items that you want to show in the Menu and click on the publish button.

Step-7:
After you publish your menu will appear in the Menus section. Now you can edit by clicking on that add or remove items and also can delete menu.
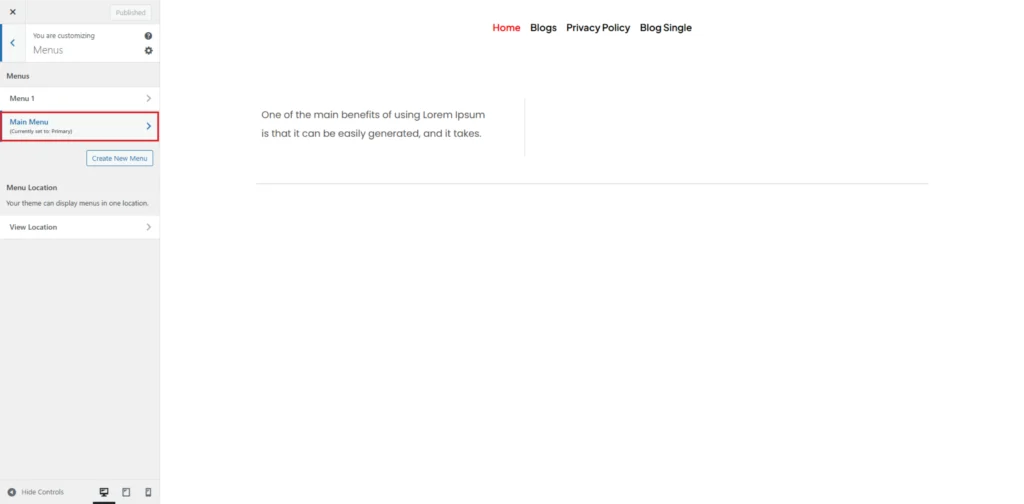
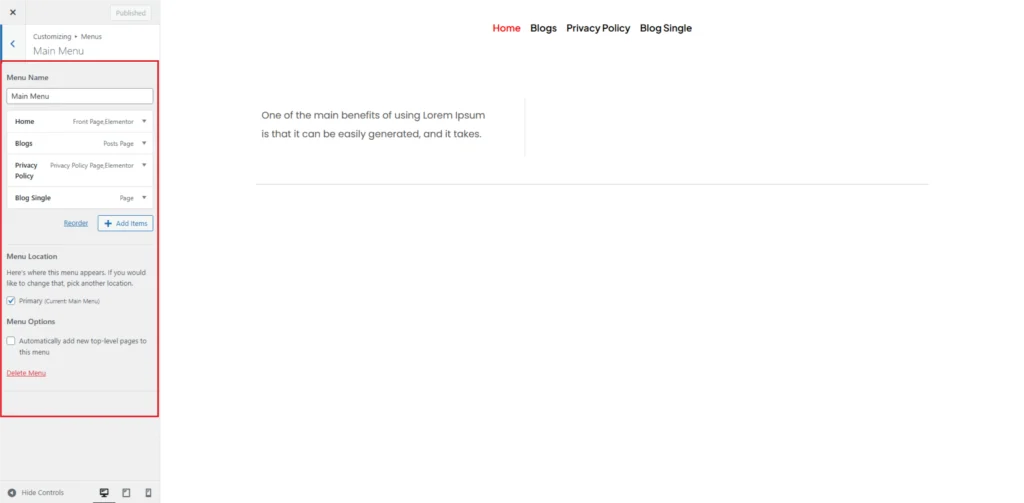
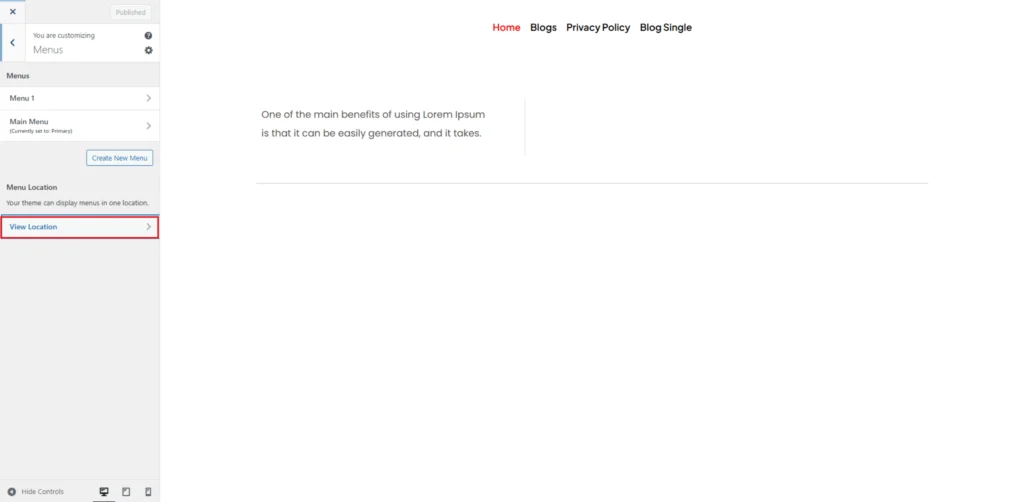
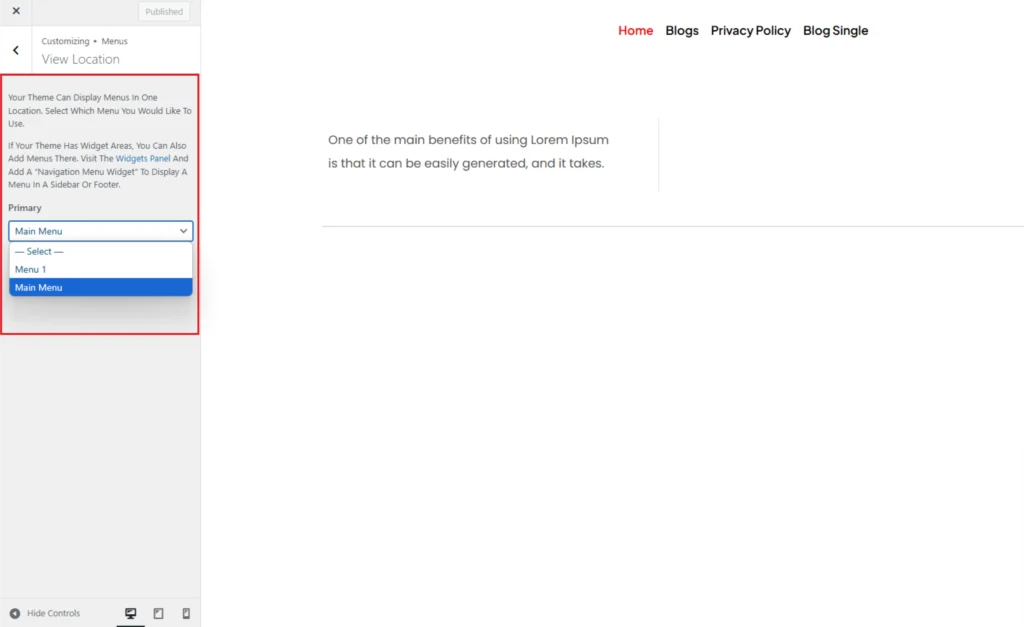
Step-8:
In the View Location option you can manage the menu location as shown in the images below.